Once the cold weather comes and
the annuals die, it’s tempting to give up on container gardening, but with a
little bit of effort, you can make a winter arrangement that costs nothing, yet
provides pleasure for weeks or even months. You probably already have the ingredients for a beautiful
winter arrangement right in your own yard.
The easiest approach is simply
to use the same containers you used for your annuals. Ideally, you never got around to cleaning out your planting
pots, so they still contain soil and perhaps even the remnants of some plants
like ivy or vinca that survive through the winter. By the way, if you plan to leave your pots outside with soil
in them, make sure they are able to take the freezing and thawing that comes
with winter. The newer lightweight
plastic or resin containers are usually fine. Metal containers work well also. Terracotta, clay, and
concrete are more likely to break when the soil expands.
It is easiest to make your
arrangements in early winter, before the soil in your containers has
frozen. If you’ve waited too long,
simple move your containers into a garage or basement to help them thaw so you
can get your cuttings into the soil.
A hair dryer may also be useful.
The next step is to look in your
yard (or an obliging neighbor’s) for attractive and durable plant
material. Some likely candidates
include fir, pine, hemlock, arborvitae, cedar, holly, boxwood, red-twig (or
yellow-twig) dogwood, Harry Lauder's walking stick, ornamental grasses, and
magnolia. You may also want to look for pinecones, interesting pods, and
attractive seed heads.
When taking cuttings from trees
and shrubs, make good pruning cuts (cut at an angle, at the base of a branch,
and don’t leave a stub). Look for
cuts that will improve the structure, remove branches that rub, and open the
plant up a little for better exposure to air and light. Don’t ruin the look of
a tree or shrub just to get cuttings.
Now comes the fun part. View your soil-filled container as if
it were a container with florist’s foam and begin sticking your cut greens into
the soil to make a pleasing arrangement.
You may want to begin with something plain like evergreen boughs, and
insert them around the base of the container to make a foundation. Have your
pruners handy for adjusting the length of the cuttings as needed. Add bushy or textured materials to fill
in the center and use tall twigs, grasses, and sticks to create height.
Just as you would for a floral
arrangement, look for interesting contrasts of shape, texture, color, and
form. If you don’t like the way it
looks, simply pull the cuttings out and start over!
View your container from all
sides that will be visible and make any adjustments until you are
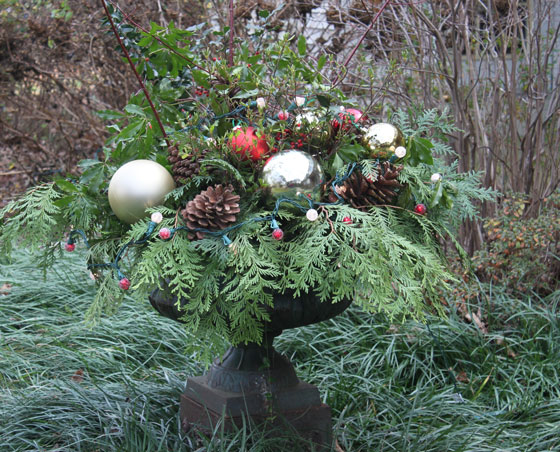
satisfied. At this point you can
add smaller objects if you wish (some may need to be secured with wire). These might include pinecones, seed
heads, thistles, or even Christmas ornaments or lights. Have fun and be creative!
* Nancy Sakaduski is the
Chester County Master Gardener Coordinator. Master Gardeners are trained
volunteers who educate the public on gardening and horticultural issues.
In Chester County, they operate through the Penn State Cooperative Extension
office in West Chester. Nancy lives in Pennsbury Township. She can
be reached at nds13@psu.edu.
About Nancy Sakaduski
Nancy Sakaduski is a Master Gardiner with Penn State Extension of Chester County.
 (No Ratings Yet)

Comments